年末年始に「0.5.16」でいろいろ描いてアップしたら、最新の「0.6.0」で軒並みうまく表示できなくなってしまった(笑)p5.js WebGLモード用のスケッチ。悔しかったので、ちょっと検証してみたのですが、少しの修正で何とか元に戻せました。
光彩画像でのグローは「描き順」を考慮しなくてよくなった
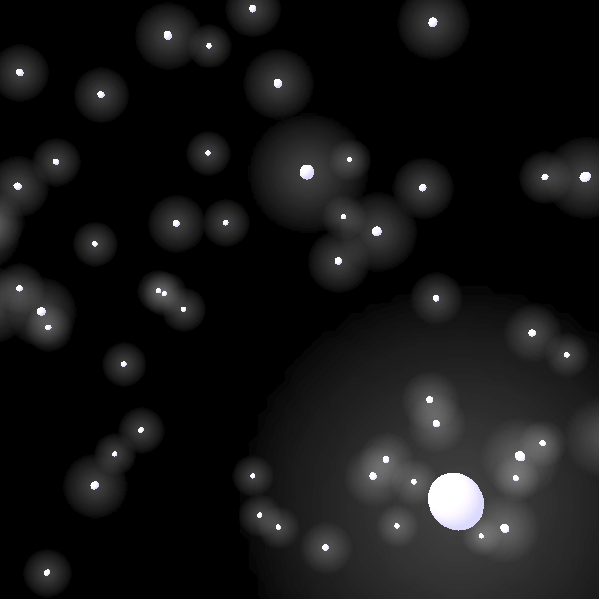
まず、年末にワリと気合い入れてやった「光彩画像を使ったグローっぽい効果」ですが、0.6.0用だとこんな感じに。
●光彩画像を使ったグローっぽい効果(0.6.0対応版)(クリックすると別タブが開きます)
直した後のコードはこんな感じ。
var sphereArr = [];
var sphereMax = 80;
var glowImg;

function setup() {
	document.body.style.backgroundColor = '#FFFFFF';
	glowImg = loadImage('./images/glow.png');
	createCanvas(600, 600, WEBGL);
	noStroke();
	ambientLight(260);
	pointLight(255, 200, 20, 255, -300, -300, 500);
	camera(0, 0, 350, 0, 0, 0, 0, 1, 0);
	for (var i = 0; i < sphereMax; i++) {
		sphereArr[i] = new PointObj(i);
	}
}

function draw() {
	background(0);
	orbitControl();
	sphereArr.forEach(allDraw => {
		allDraw.drawPlane();
		allDraw.drawSphere();
		allDraw.update();
	});
}

class PointObj {
	constructor(depth) {
		this.x = random(-300, 300);
		this.y = random(-300, 300);
		this.z = random(-300, 300);
		this.xmove = random(-1, 1);
		this.ymove = random(-1, 1);
		this.zmove = random(-3, 3);
	}
	drawPlane() {
		push();
		translate(this.x, this.y, this.z);
		fill(0, 0);
		texture(glowImg);
		plane(50, 50);
		pop();
	}
	drawSphere() {
		push();
		translate(this.x, this.y, this.z);
		ambientMaterial(220, 220, 255, 255);
		sphere(3);
		pop();
	}
	update() {
		this.z = this.z + this.zmove;
		if (this.z > 300 || this.z < -300) { this.zmove = -this.zmove; }
	}
}
修正のポイントですが、まずライト類をsetupのほうに集めて、マテリアル設定と一緒にパラメータを調整。同じ数値だと、前よりも暗め(?)に出るようでした。
そして、planeへのテクスチャの設定ですが、大事なのが40行目に加えた「fill(0,0)」。texture()でテクスチャを「設定する前」に、この指定をしてfillのジオメトリを復帰させてやります。第1引数は色指定ですが、どうせテクスチャを張ってしまうので何でもいいです。第2引数はアルファ値ですが、ここには「255以外」の数値を設定してやります。255以外であれば、テクスチャとして張った画像のアルファ値が反映されるようです。255にしてしまうと、テクスチャ画像にアルファ値が設定されていても透過しなくなりました。
ちなみに、以前のバージョンでもそうだったのですが、テクスチャ画像に設定したアルファ値での透過は、backgroundで指定した色を「無視して」、ブラウザの背景色(document.body.style.backgroundColor)の影響を受けます。…ということは、DOM操作して透過の色をダイナミックに変えることとかできそうですね。ちょっとチートっぽくはありますが。
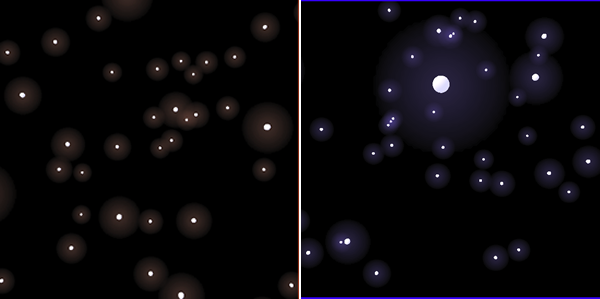
そしてそして、以前のバージョンでは透過がうまくいくか、いかないかが、オブジェクトの描き順に依存していたため、わざわざカメラからの距離を計算して、配列内で遠い順にオブジェクトを並べ替えるという処理をしていたのですが、0.6.0では「並べ替えの必要がなくなりました」。前のスケッチでは、その処理のために「zOrder」という関数を作りましたが、今回のスケッチからは外しています。orbitControlを入れておいたので、試しにマウスドラッグして、裏側からスケッチを見てみてください。裏から見ても、ちゃんと透過で表示されます。挙動としては、こちらのほうが正しいですよね。ちゃんと修正されたようでよかったです。
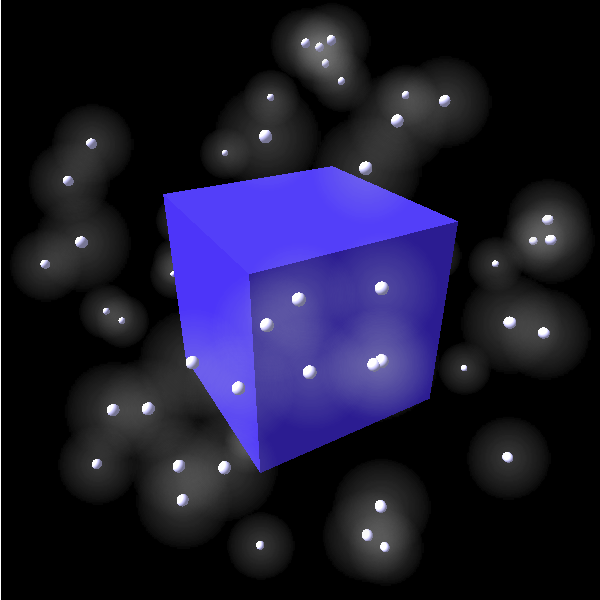
もう1個、ついでに0.6.0対応させてみましたのでご参考までに。修正個所は、基本的に上のものと同じです。
●回転する立方体と球面上のグロー付きsphere(0.6.0対応版)(クリックすると別タブが開きます)
変更後のコードはこちら。
const sphereArr = [];
const sphereMax = 60;
let RADIUS = 180;
let glowImg;

function setup() {
	glowImg = loadImage('./images/glow.png');
	createCanvas(600, 600, WEBGL);
	noStroke();
	camera(0, 0, 400, 0, 0, 0, 0, 1, 0);
	ambientLight(150);
	directionalLight(255, 255, 255, 255, 1, 1, -1);
	for (var i = 0; i < sphereMax; i++) {
		sphereArr[i] = new PointObj();
	}
}

function draw() {
	background(0);
	drawCenterSphere();
	sphereArr.forEach(allDraw => {
		allDraw.drawPlane();
		allDraw.drawSphere();
		allDraw.update();
	});
}

function drawCenterSphere() {
	push();
	rotateX(frameCount / 100);
	rotateY(frameCount / 100);
	ambientMaterial(50, 50, 255, 255);
	box(150);
	pop();
}

class PointObj {
	constructor() {
		this.deg1 = random(0, 359);
		this.deg2 = random(0, 359);
		this.x = cos(radians(this.deg2)) * sin(radians(this.deg1)) * RADIUS;
		this.y = sin(radians(this.deg2)) * sin(radians(this.deg1)) * RADIUS;
		this.z = cos(radians(this.deg1)) * RADIUS;
		if (random() < .5) {
			this.deg1Add = -.5;
		} else {
			this.deg1Add = .5;
		}
		if (random() < .5) {
			this.deg2Add = -.5;
		} else {
			this.deg2Add = .5;
		}
	}

	drawPlane() {
		push();
		translate(this.x, this.y, this.z);
		fill(255, 0);
		texture(glowImg);
		plane(50, 50);
		pop();
	}
	drawSphere() {
		push();
		translate(this.x, this.y, this.z);
		ambientMaterial(200, 200, 255, 255);
		sphere(3);
		pop();
	}
	update(rad) {
		this.deg1 += this.deg1Add;
		this.deg2 += this.deg2Add;
		this.x = cos(radians(this.deg1)) * sin(radians(this.deg2)) * RADIUS;
		this.y = sin(radians(this.deg1)) * sin(radians(this.deg2)) * RADIUS;
		this.z = cos(radians(this.deg2)) * RADIUS;
	}
}
あと、以前「The Coding Train」でShiffman先生がIssuesにレポートしていた「pointLightを複数指定すると最後のものしか有効にならない」というバグも直ったようですね。
●0.6.0 pointLightsテスト(クリックすると別タブが開きます)
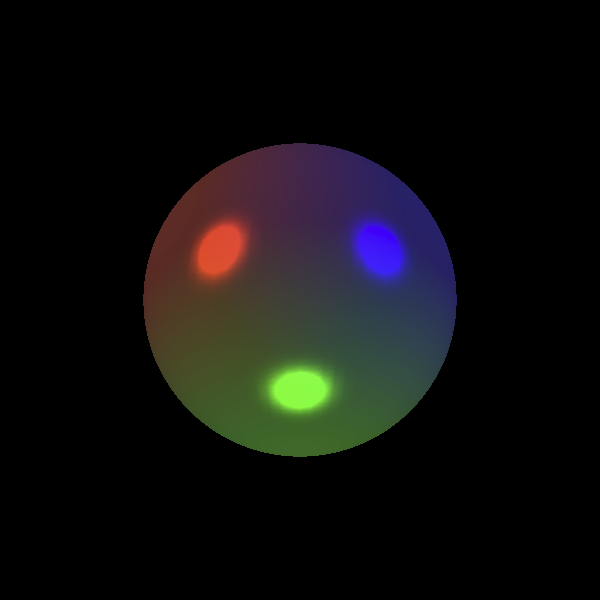
ちゃんと色の違う3つのpointLightのハイライトが出ています。コードはこちら。
function setup() {
	createCanvas(600, 600, WEBGL);
	noStroke();
	ambientLight(30);
	pointLight(0, 0, 255, 255, 800, -500, 500);
	pointLight(255, 0, 0, 255, -800, -500, 500);
	pointLight(0, 255, 0, 255, 0, 800, 500);
}

function draw() {
	orbitControl();
	background(0);
	specularMaterial(255, 255);
	sphere(150, 100, 100);
}
少しずつちゃんと動くようになってきているようで何よりです。
WebGLモードのスケッチを0.6.0用に書き直してみた(暫定) はコメントを受け付けていません